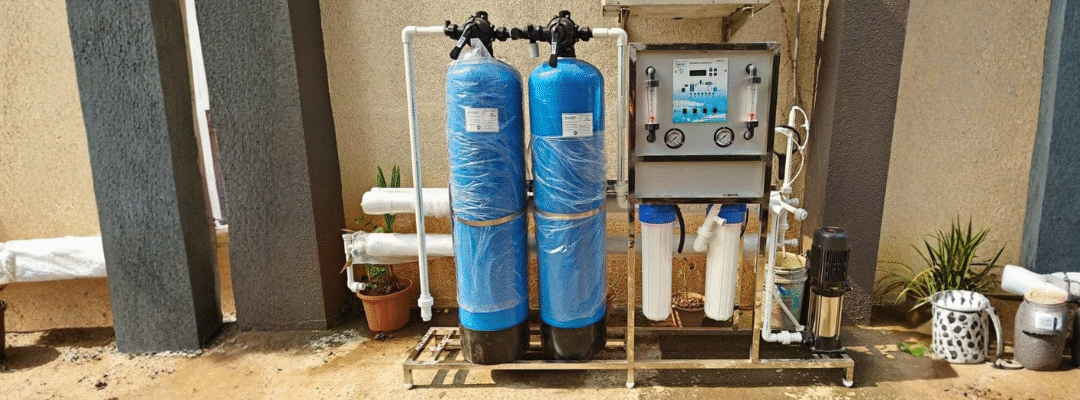
Installing an industrial Reverse Osmosis (RO) plant is a mission-critical step for industries aiming to ensure reliable access to high-purity process water.
But even a small installation mistake — like poor pump anchoring or misaligned membrane housing — can lead to efficiency loss, membrane failure, or high maintenance costs.
That’s why a structured, field-tested installation checklist is essential. Whether you’re a plant engineer or project manager, this guide walks you through every stage — from site readiness to commissioning and handover — to ensure smooth setup, safety, and long-term success.
1. Site Preparation and Layout Planning
Before installation begins, the physical site must be fully prepped.
Checklist:
- Sufficient floor space with expansion margins
- Stable, level foundation with working drainage
- Proper lighting and ventilation inside the RO room
- Easy access to raw water source, drain, and power
- Vibration-free base for high-pressure pumps
- Color-coded piping (feed, permeate, reject)
- Sunshade or enclosure for outdoor units
Field Tip: Leave at least 1 meter clearance around all major equipment for maintenance access.
2. Mechanical Installation
Correct mechanical assembly ensures the system operates at its designed performance.
Checklist:
- Anchor pre-filters, dosing tanks, and RO skid securely
- Use correct pipe material: UPVC/CPVC for non-metallic, SS304/316 for critical lines
- Check all fittings, joints, and supports for leaks or stress
- Install gauges, flow meters, valves in logical order
- Ensure membranes and housings are properly aligned and lubricated
Caution: Never use sharp or metallic tools around membrane housings — even small cracks can cause operational failure.
3. Electrical Installation
Ensure electrical safety and system protection before powering up.
Checklist:
- Dedicated MCC panel for the RO system
- Power rating matched to motor and pump specs
- Cable trays and conduits to organize wiring
- Earthing/grounding for each motor and control panel
- MCCBs, contactors, overload relays sized as per motor load
- Variable Frequency Drive (VFD) for high-pressure pumps
- Label all wires and control switches
- Test PLC and sensor signals for proper communication
4. Pre-Treatment System Setup
Pre-treatment protects your membranes from irreversible damage.
Checklist:
- Backwash and fill multimedia and carbon filters
- Load media per design spec and vessel size
- Calibrate dosing systems (antiscalant, SMBS, pH correction)
- Check orientation and rating of cartridge filters
- Use NRVs and flow restrictors to prevent reverse flow
- Tip: A well-calibrated pre-treatment can reduce membrane cleaning needs by 30–50%.
5. RO Skid & Membrane Handling
Membrane installation requires extreme care.
Checklist:
- Mount RO skid on a stable surface
- Flush all piping lines to remove construction debris
- Use RO-approved lubricant (never petroleum-based) for O-rings
- Install membranes in correct direction (check arrows)
- Evenly tighten end caps and check housing pressure rating
- Align and secure high-pressure pump to avoid coupling wear
Pro Insight: Always hydrate the membranes after installation — running them dry can permanently damage the structure.
6. Instrumentation & Automation Setup
Proper sensor calibration is key for monitoring and alarms.
Checklist:
- Calibrate pressure, flow, and level transmitters
- Validate TDS/conductivity meters with standard solution
- Test all interlocks (low pressure, tank level, TDS high)
- Simulate fault conditions to confirm SCADA/PLC responses
Test Before Run: Confirm that alarms and emergency stops trigger correctly before water flows.
7. Chemical Dosing Preparation
Dosing setup must be safe and precise.
Checklist:
- Prepare chemical solutions at specified concentration
- Prime dosing lines and pumps (remove air locks)
- Ensure suction filters and NRVs are in place
- Set dosing rates based on feed TDS and flow
- Label tanks and lines with chemical names and PPE symbols
Safety Tip: Provide full PPE to all operators — gloves, goggles, and masks are mandatory during handling.
8. Startup and Commissioning
Gradual startup protects your system during its first operation.
Checklist:
- Set valves to startup position
- Begin with feed pump and check for leaks
- Gradually open high-pressure valve
- Flush RO membranes for 30–60 minutes
- Monitor pressure, flow, TDS during startup
- Confirm reject-to-permeate ratio (e.g., 3:1 or 2:1)
- Record baseline parameters for performance tracking
Tip: Save first-run readings (flow, pressure, TDS) as reference for future troubleshooting.
9. Post-Installation Verification
Before handover, verify performance and system stability.
Checklist:
- Confirm auto-flush and dosing interlocks function
- Check for vibration, pressure drops, or abnormal noise
- Inspect all pipe joints for slow leaks
- Run plant for 24 hours under load
- Train staff on routine checks and maintenance
- Prepare final documentation package
10. Documentation & Final Handover
A proper paper trail supports long-term maintenance and compliance.
Handover Documents:
- Commissioning Report
- Water Quality Analysis
- Electrical Test Certificate
- Operator Training Log
- Service & Warranty Agreements
Pro Tip: Provide a printed and digital copy of the O&M manual for future troubleshooting and training.
Frequently Asked Questions (FAQs)
Q1. How long does industrial RO installation take?
→ Typically 5–10 days depending on capacity and site conditions.
Q2. What safety practices are mandatory during installation?
→ PPE, isolated electrical panels, clear chemical labeling, and grounded tanks.
Q3. Can membranes be installed dry?
→ No — membranes must be kept hydrated and installed wet.
Q4. How is the plant tested before handover?
→ A 24-hour trial run with checks on flow, pressure, TDS, and system stability.
Q5. What should be included in handover documents?
→ O&M manual, commissioning log, test certificates, warranty, and as-built drawings.


Recent Comments